Wednesday, March 23, 2016

Training works!


None of this would be possible without the RCTM hangboard training and the Forge!

Thursday, March 10, 2016

Kilter/Moon Hybrid update #1

 These are 7 sets of Kilter holds that we added to our Hybrid Wall today.
(Top Left) Noah Small 5- Rounded Crimps; Winter XL 1-Slugs (Right)
(Second Row Left) Noah Large 5- Overjugs, Winter Large 5- Jugs (Right)
 (Third Row Left) Noah Medium 17- Mini Jugs, Winter Small 9- 2 pad incut Edges (Right)
(Bottom Right) Teagan Medium 1- Mini Jugs

This project currently uses the black and white moon sets.


The Kilter / Moon Hybrid 

Angled shot 

Beta Fish nearing completion


I am really glad that we used the Moon grid layout for the t-nuts, and I am even happier that we also added the additional grid.  Moon has you making a 6 by 11 grid on each 4X8 sheet, which is not very dense (by home woody standards) so the extra 5 by 12 grid we added in the centers gives us plenty of options.   I would say that we still have room for 200 more holds on our moon/kilter hybrid wall if we want to add them.   Using this double grid allows us to set up any moon problems that we want but also integrate other holds.   

We kept all of the Kilter holds on the original Moon grid, except for a few holds in the middle where we ran out of space.  If we want we can get another 50 kilter holds (perhaps in Red) to flesh out the wall with more compact, interesting holds.

The huge plus of the moonboard is the 100's of problems per set up, and the style of problems.  Moon problems are characterized by limited feet and big powerful moves between challenging holds.  In terms of style they are super intense limit problems-  like a cross between campus training and bouldering.  

I would not make a moonboard and just leave it with the standard holds in a home wall because the hold selection is too limited and extreme for most climbers.  I love the Moonboard and the problems, but the addition of the Kilter holds adds so much extra functionality without detracting from the moon problems.

Kilter holds have have a reputation for being awesome but also expensive.  However, for a use like this intense training wall they are more than worth every penny.  When it comes to the small space of a moonboard the opportunity cost for each hold has to be weighed against the quality of the hold and what it contributes to the wall.  The Kilter holds we chose gave us the best proposition for money and space.  The overjugs are incredible-  super comfortable, more than positive, and non obtrusive.   The slugs are slopey jugs that are hard to match and surprisingly compact for how deep they are.  

The moon sets (black and white) are very rough because they were shaped from a lower density foam.  The shapes might seem primitive and a bit uncomfortable.  However, they are interesting and reminiscent of the uneven shapes you find on hard limestone routes (like at American Fork or Logan Canyon) because they are often angular in ways that don't make them easy to use.  They require extra attention and effort to latch safely and to use.   I think this can be a good type of realism to integrate into your indoor training, but it is also a bit dangerous.  You cannot just throw for these holds with impunity-- you have to be careful or you will tweak something (as I learned a month ago).   

There are no jugs and no deep slopers in the moon holds.   The moon wall is not ideal for warming up (unless you are uber strong).   The Kilter sets we got largely fill these missing niches.   We can warm up on our hybrid wall as well as do 45 move circuits.

The Kilter Overjugs set are super positive and comfortable, so we have actual V0/V1 problems to play around with and warm up and down climb.  The hybrid between the Kilter and Moon holds makes both sets much more valuable and makes the wall usable for much more varied climbing.   

I did some endurance work at the end by climbing up and down the hybrid wall until I was too tired / sore to continue.  That is something that is not possible on a standard moonboard unless you are very, very strong.  

Wednesday, February 3, 2016

Home wall construction updates


Together with a good friend I am working on my 6th home bouldering wall and 9th new wall.  In the process we have learned some valuable insights into wall construction, and I figured I would document key parts of that process.  The wall is named Beta Fish.

Tools we used:  Circular saw, corded drill, 2 cordless drill and impact driver sets, orbital sander, t-square or long straight edge, angle measuring app on a smart phone, 15 pound dumbbells, pencil, clamps,  extension cord, socket drivers, vise grips, sturdy ladders, chop saw.

Fasteners:   self drilling star drive construction screws in a couple of different lengths for both attaching plywood to frames and reinforcing junctures of framing; lag screws in a variety of lengths for connecting framing, washers, as necessary, carriage bolts for connecting framing, locking nuts and washers for carriage bolts, wood glue, scraps of plywood.

Materials:   3/4 inch standard pine plywood (actually 23/32), pine 2X6 in 12 foot and shorter lengths, standard pound in t-nuts.

Here is the section of the garage for the wall.  The room has12 foot ceilings.
6 foot tall person for scale.

The moon wall is 40 degrees overhung.  We used string to
sketch the angle and location of the two main walls.

The 12 foot 2X6 meets the upper section that protrudes through 
the ceiling, and attaches to the top and bottom chord of the rafters.

We used plywood on both sides, glued, clamped, 
screwed and carriage bolted the connections in place.

All 5 of the finished connections.  We used a long straight edge to test 
that all joists were at a consistent angle, and adjusted a couple before gluing. 

They are strong.  The 2X6's are also connected to the structure with 2X6's at about 
6 foot height, which will double as a shelf.

We used the Sawsall to trim some of the connections back
so that we would not block the plywood on the arete. 

We each had a drill and driver set.  All four tools came in handy
while working on the connections.  So did the beer.

The wall is taking shape!

Detail on the connection method we used.
The plywood is glued on both sides of the 2X6's.

At the top the 20 degree wall is just connected to the bottom chord of the rafters
so we reinforced that with these connections to the wall joists.  
These connections are glued and screwed.

The horizontal reinforcements for the 40 degree wall have screws and 
carriage bolts on the climbing wall side.   The plywood of the shelf will reinforce 
the joist hangers and screws on the structure side..

The left side of the 20 degree wall connects directly to the side wall
which adds a lot of stability to the climbing wall.

The right arete is reinforced into the bottom and 
top chord of the rafters.

We used carriage bolts, lag screws and self driving construction screws 
to attach the wall 2X6's to the existing wood frame construction.

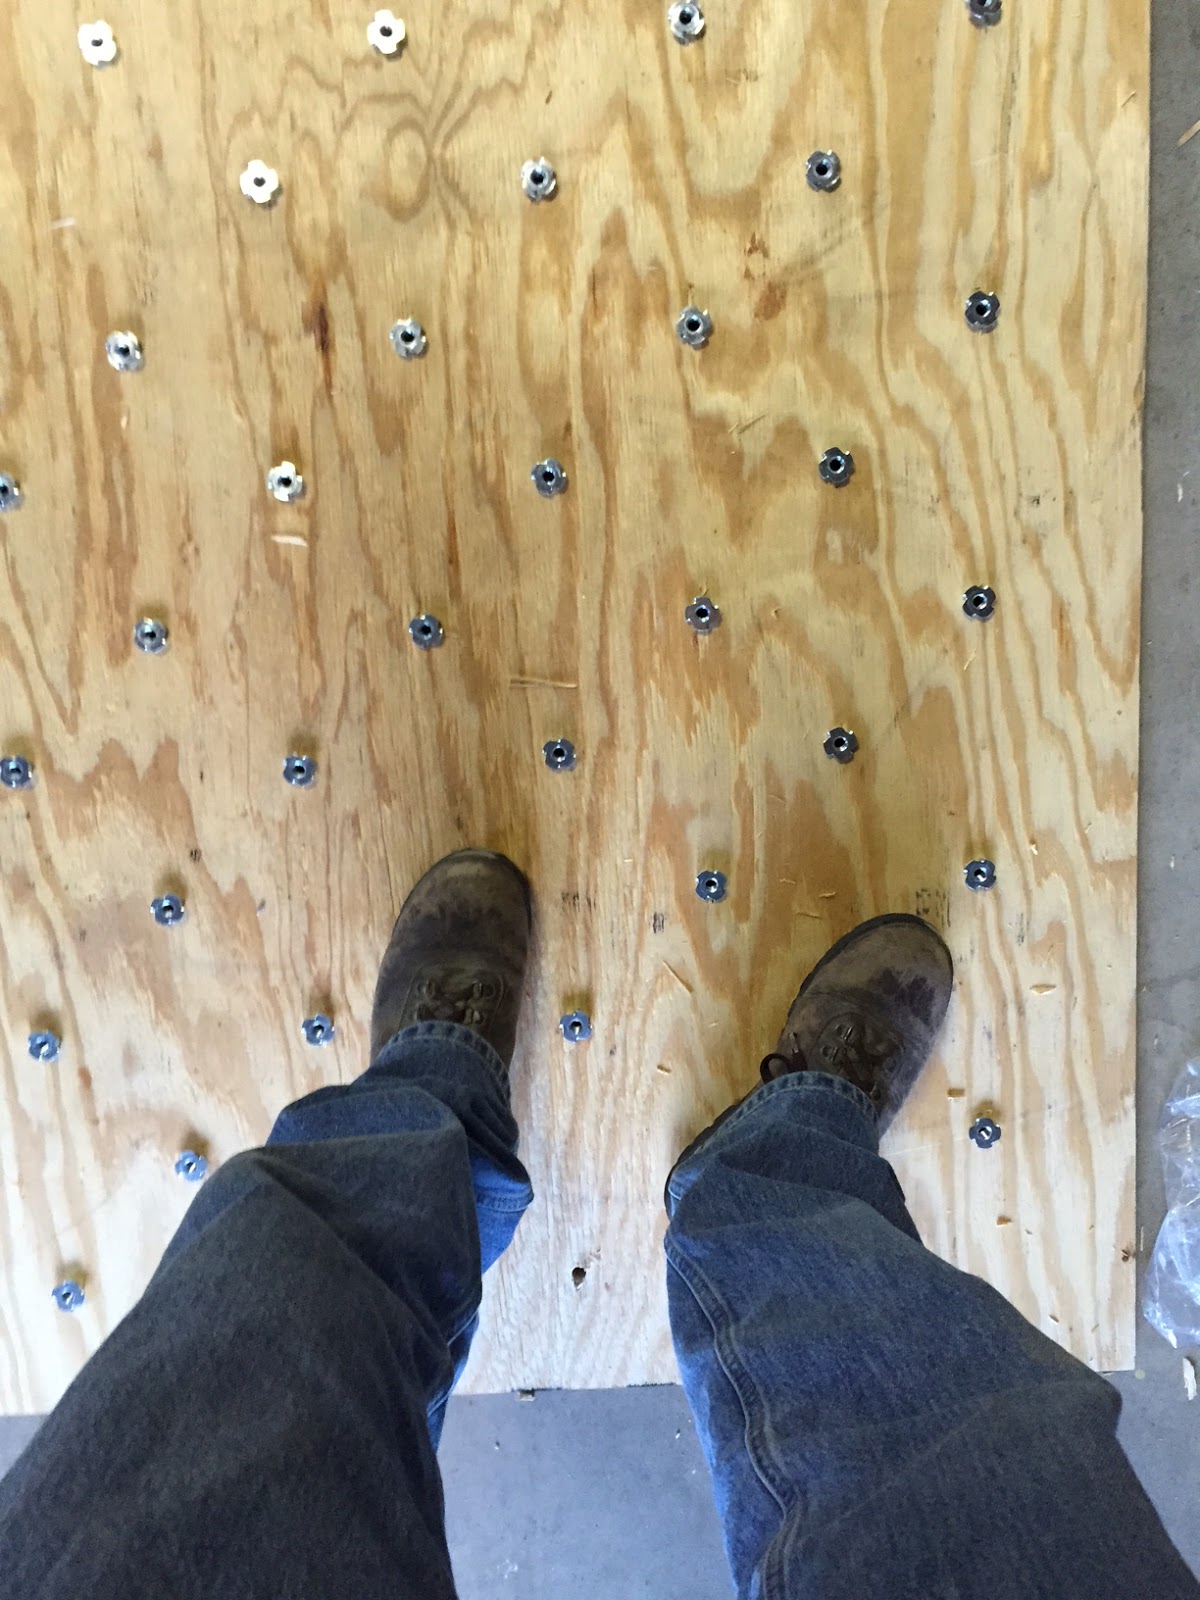
We cleared the 7/16 drill holes of splinters with our boots or a sander.
We pressed the t-nuts in the holes. 

Then we pressed them in with our boots before pounding 
them in using 15 pound dumbbells.  Notice the moon wall grid 
plus extra grid of t-nuts in the centers.  We placed 126 t-nuts per sheet.

The wall was coming together!  
Notice the stack of plywood sheets that we drilled in a batch of 5.

Moon set A in setup #4

Both sets A and B, plus foot holds on the kick plate.  The 20 degree wall is also 
sheeted with the same moon grid layout.  If we want we can set the 
moon problems on the 20 degree wall (with slight modification 
due to about 3 missing inches of height). 

Transitions between different angled planes are tricky.  
We used a combination of an easy to build overhanging arete 
that follows the same 40 degree angle but set back and to the side of the wall. 
These sections are fun to climb and are easy to build.
The triangular section between the 20 degree and 40 degree is trickier to set up, 
but results in a nice looking solution that is also fun to climb.

You can connect two different angled planes with a series of 
alternating triangles.  In our case we have an arete and dihedral down low
that transitions to a dihedral and arete up high.   We tied strings from corner to corner to measure the initial border of each triangle.

Once we had the measurement we connected the joists with a 2X6 cut and angled to fit between them, and counter sunk the screws to get good purchase.  Then we cut the plywood to fit and tacked it in place.

We have a few sections remaining on the aretes and headwall, but we were able to put up some problems on the 20 degree and transition wall in addition to the moon holds with a few extras.

Here you can see the transition triangle wall and the overhanging arete.

Here is a detail of the triangle transition section, 
where you can see the changing corners effect.  
We placed t-nuts more closely in the small triangles 
to maximize flexibility of the space.

I will follow up with more photos as we progress.

As promised I am following up.  We finished the left arete and added the headwall
to the moon board.   The only things left are the right arete
and the vertical wall to the left.

Profile shot of the left overhanging arete.  We are super excited to get some slopers
onto this section.  The top includes a series of jug rails to facilitate the finishes.

This view is from above and shows the scale of the wall.
The moonboard headwall will have a jug rail at the top plus
room for some holds over the lip.

the mean hold:

Thursday, January 14, 2016

Busy dojo, future of Beta Fish.


Thursday the 15th of January 2016 was a busy night at the Dojo in Athens Ohio.  In some exciting news, however, a new venue is on the horizon.  Beta Fish!


The first stage of Beta Fish will include a 40 degree wall with a headwall and dual, blunt, overhanging aretes.  To the left is a 20 degree wall connected to the left arete through a series of small angular panels.  To the left of the 20 degree wall is a vert and slab wall at 90 degrees from the main walls.  So psyched to work with Bryant on this exciting project!


Thursday, November 5, 2015

Coming back to climbing as a 40+ climber

(Photo courtesy of Dustin Moore)

When I was younger I climbed and trained extensively.  However, during my 30's I retired from active climbing, focused on school, work, and raising a young family.  Sporadically we visited old climbing haunts, and I found it estranging to feel more like a tourist than a climber at places like Hueco Tanks or the New River Gorge.  Moving back to Ohio reestablished the possibility of spending weekends at the Red River Gorge, but it was not until our kids got a bit older that we went to climb.

I clearly remember our first visit to Muir Valley in the Spring of 2012 and the bittersweet experience of being back at the Red while not "being back to fitness" as a climber.   At the practice wall, and then at the Great Wall I led the easiest routes to set up top ropes for my kids.  Even on the 5.7's I felt challenged, and I tired quickly on easier 5.10 routes.  After lowering off of Dynabolt Gold (5.10a) I looked wistfully across the valley to the tall overhanging 11s and 12s of the Solarium.  Those were the sorts of routes I used to love to climb, but they seemed impossibly far away.

After that trip I added to my spreadsheet record of my recent recent flash or onsight lead climb successes, with an average grade of 5.8.


25 years ago an old friend and climbing mentor had suggested that a good way to assess your current climbing level is to take the average grade of your 10 best recent routes.  So, in Spring of 2012 these  were the 10 routes that I had flashed on lead, with an average grade of 5.8.   So, as of Spring of 2012 I was a reasonably consistent 5.8 sport climber.  In three and half years I have progressed to an average grade of 5.11c for first-try routes.


So far I have learned a couple of lessons during the process of coming back to climbing.

  1. Be honest about where you are in the moment.  Measuring your current climbing in terms of your best 10 recent routes reveals more than any single route.  3.5 years ago I had to recognize that I was a 5.8 climber.  Now I am climbing consistently at the 11c level, and I have a way to go in order to climb 5.12 with the same confidence.
  2. Progress is incremental and easiest to witness through record keeping.  If it were not for my climbing journal I would not know what level I was at 3.5 years ago.
  3. Training brings slow, predictable progress.   Since spring of 2014 I have trained systematically according to the periodized schedule advocated in the RCTM.  The results are that I am slowly getting better every climbing season.  This is perfect, and allows me to enjoy the routes at my current level knowing that the next level of new climbs is waiting in the wings.   

(Photo courtesy of Dustin Moore)


Thursday, October 22, 2015

Updated hangboard setup


I installed the Forge using a french cleat to augment my RPTC.  Some grips, like the IMR carryover, but have been made more challenging.  Others are new introductions, like the slopey crimper and the mini-crimp with thumb catch.

My big question for winter training season is deciding on which grips to use from the two boards.  I do know that I will be using the slimper, or slopey crimper because it seems super relevant for sandstone cruxes (see the Anderson's discussion). Also, the new pinches can be used as super deep open hand jugs, which also seem very helpful to include in my training on the board (see my discussion of deep handholds).

In the first photo you can see that there are multiple sets of eyebolts which will allow me to have two pulley setups running at the same time.  This will make switching from one board to the other faster and will allow two people to complete their hangboard sessions at the same time.  The Forge is also located higher from the floor which puts me in a more comfortable position while hanging from the grips.


I used a 2X10 to create a mounting board and a french cleat to allow width adjustment.  I often find myself wishing to adjust the RPTC, but it's location on the bouldering wall precludes that option.  To make the cleat I ripped a 4 inch strip from the center of the 2X10 with the saw angle set at 30 degrees.   The outer strips are bolted to the remaining section of 2X10 and the 4 inch board mounting sections slide in the gap.

I am really happy to have the adjustable width mounting.  I am not the most skilled carpenter so there is a very small amount of play in the system causing the grips to shift very slightly when weighted.

I also purchased the pulley set with the super nice low friction pulleys.  They are a major improvement over the hardware store pulleys that I had been using.


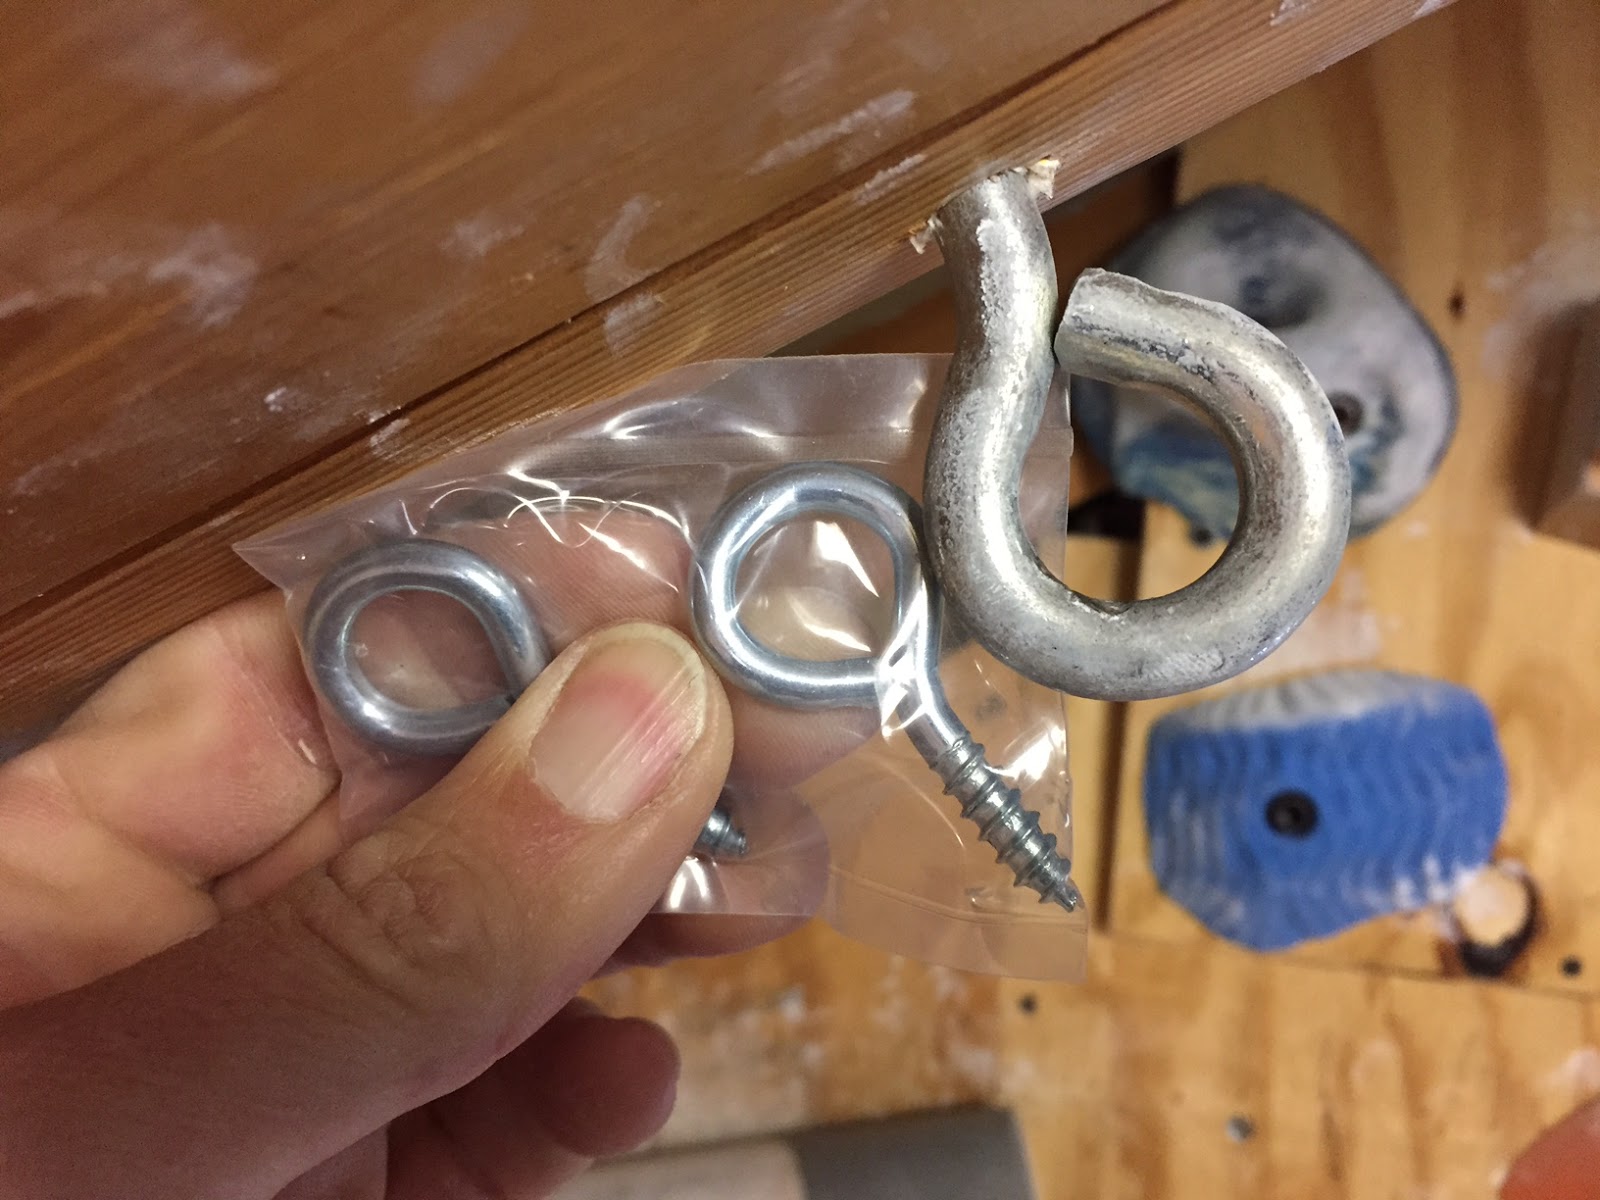
The one drawback of the system is that it ships with eye-bolts for mounting the pulleys that are (in my opinion) insufficient for the task.  I would be reluctant to hang a potted plant from such small eye-bolts.  Not only are they weak and shallow, but the eye is almost too small to fit a biner.  Here they are next to an eyebolt with a fully functional working capacity.


Friday, September 18, 2015

Getting more value from your bouldering wall

(This is the cover of the Dojo guidebook)

Like Bruce Lee, our Dojo packs a lot of quality into a small frame.   The wall is only 7.5 feet tall (at the center), but it fills a wide room that allows traverses and roof crossing.   In that space we have over 70 problems, ranging in length from 3 moves to 80, and difficulty from V0 to V10.

What can you do with your holds and problem setting to get more value from your home climbing wall?  Here are some ideas that we have been using at the Dojo:

  1. Increase diversity of hold selection
  2. Develop a wide repertoire of problem types
  3. Document the routes with a guidebook
  4. Record community accomplishments in the guidebook

Diverse holds: 

Elsewhere I describe holds that I especially like, but my most important rule is that I want basic holds for cheap so I can spend money on compelling holds that expand the diversity and allow movement types that would otherwise be impossible.  


The very big:  holds like the Teagan Kaiju stalactites are ideal for this, and the "Kids Kaiju" problem feels super 3 dimensional, and even has a roof kneebar that my daughters discovered.  Along with the three Kaiju we have 4 more giant holds from Etch and Urban Plastix.   These rare but valuable holds are in contrast to the smallest, most numerous, and most technically valuable holds.  

The very small:  On the far side of the spectrum are 100's of tiny jibs that increase the realism and training value of all of the problems.  Some of the best of these are the sandstone chips from eGrips, multifaceted, small and technical.  I also have dozens of simple homemade jibs made from bean sized sections of oak molding.  

The very compact:  most home walls have limited space, so the best hand holds will offer distinct types of grips with small footprints.   Wide bottomed slopers are not ideal because they consume so much real estate.  In the space of one sloper you might fit in 4 or 5 more compact holds, that could allow for simple edges, gaston moves, underclings, pinches, etc.  The photo on the right includes UP ribbon pinches, Atomik system holds, comfy crimps & bubble wrap ledges from eGrips, screw on edges from Synrock, and green Kilter Winters and purple Teagans which offer great directional edges with small footprints.  

Punchline:  the ideal home wall will maximize both the diversity and density of holds.  This allows the most variety of problems to cross the same space.   So, don't be afraid to add extra t-nuts, or screw the holds in with deck screws in the spaces between your other holds.  While you are at it throw in some more jibs, which you can buy in color coded sets to make problems that just use a certain color of footholds.   


Set a wide variety of problem types

 If (A) you have many diverse holds and (B)  you have a lot of good problems then (C) you do not need to move your holds often.  This saves work and builds continuity.  So, fill your wall before you move your holds.  If you have densely packed diverse holds you will have no shortage of good movement options through every square foot of your wall.  We use different rules for different problems to get more options for building skill and training.

(The standard problem "Mercy, the Pabst" starts and finishes on the PVC pipe above the clock; the foothold only constraint problem "Blues Clues" starts and finishes on the blue taped footchip on the right, and includes all similar blue, tic marked footchips; the tracking problem "Black Flag" starts on the left side of the low angled roof and finishes on the roof rail in the foreground; the sequenced problem "Tuna Town Trainer" has hold number 34 in the foregrounded roof crimp.)

Standard taped problems:   Standard problems have taped handholds and allow any foothold.  Most are 5 to 15 moves long.  However, "Mercy the Pabst" is a 60 foot room traverse with about 50 hand moves.  This 5.11a mimics the Red River namesake with boulder problems punctuated with good rests.  With technical and fitness cruxes this route provides a tangible goal for many climbers that helps usher in the resting and route planning skills necessary to climb solid 5.10 outdoors.  For others, the same route is just part of their 20 minute ARC sessions, or a handy litmus test for recognizing low gravity days.  

Tracking:  Tracking problems restrict both hands and feet to taped holds.  These allow a higher level of control over movement and generally lead to more extreme positions than the "any feet" rule of  standard problems.  This rule is typical for mid length problems that integrate distinctive moves like heel hooks, bicycles and foot cut moves.  These problems tend to feel like "real" boulder problems while standard problems feel more like route climbing at the Red.   An even more "realistic" rule is tracking plus "naturals".  Naturals are small built in features like bolt heads, or seams in the plywood.  Discovering the right natural edge to make a problem go is similar to the foothold discovery  process outside. 

Jibs only:  However, even tracking can be too generous.  Most handholds present large footholds, so creative rules are needed to make routes sufficiently technical to become good skill training.   Most problems are "any feet" and others are "tracking and jibs" wile others are "jibs only".   Jibs only problems are reminiscent of some granite bouldering where handholds are generous but footholds are miserly.  These constraints create radically different types of moves and challenges that motivate climbers to become more technically skilled and gain greater outdoor experience.  Jibs only versions of standard problems often up the difficulty by about 2 V grades.  

Letter wall:   Our 70 degree wall has a bunch of holds taged with letters from A-Z.   Here climbers can invent new problems by simply listing the letters of the holds.  Old style home woody walls sometimes used named holds in a similar fashion.  This old "woody" rule allows us to make new variations easily and we then record them on a record sheet on the sidewall.  The most popular get added to the main guidebook in both standard and jibs only versions.    

Foothold only constraints:   "Blues Clues"  is a 12b room traverse that restricts the footholds, but is open hand holds (minus handlebars).   The feet are tiny, technical blue footchips that are strategically placed to require body tension and effort, even while grasping large jugs.  This foothold only constraint creates a much more technical and powerful route than would be possible with such good handholds and tracking.  

Constraints of omission:  The moderate traverse "No roof match, no cry" simply marks the start and finish, and then constrains climbers to avoid holds on the roof, and excludes matches and re-uses of holds.  This constraint forces climbers to think more carefully about sequence and finding the best option, even on terrain where there are plenty of good holds.  This ability to translate holds to movements is extremely helpful at areas like the Red, where choosing the wrong movements can add several letter grades of difficulty.  

Sequenced:  Numbered sequence problems are tagged by tape and number, and the holds have to be followed in order.  This allows routes to force matches, or prevent them, and routes can overlap themselves and create movement sequences much longer than the wall size would allow.  For instance, the "Tuna Town Trainer" has about 80 hand movements.  We also have power endurance training routes with numbered holds to help us tailor our effort to reach maximum fatigue at the right moment on the route. 


Create your own Guidebook

Yoichi visited Tokyo last summer and bouldered at Climbing Gym VOLNY where they have a wall with dense holds that are never moved, and routes are recorded in a book with a photo of each route, the holds marked, and a place for climbers to log their successful ascents. This makes the most out of a small space by creating a lasting record of the problems that people do, and subsequently repeat.  Like a local outdoor boulder with a host of eliminates, their wall with their guidebook becomes a repository of the cultural history of the climbing area.   


Guidebooks for discovering problems:  We have started to document our accomplishments in the guidebook book, and so far, it has been an excellent addition to the Dojo.  The book motivates climbers to tackle new projects, helps them identify problems that are in their range but have not yet sent, and brings attention back to old favorites.  


Sign the route registry:   After sending problems climbers get to sign their initials and date next to the problem description.  This individual record keeping creates a satisfying ritual.  It is nice to see your efforts affirmed, even if it just a printout of problems in a home bouldering wall. 

Distribution of community experience:   Signatures accumulate and reveal the more popular problems, as well as revealing the types of climbers who tend to climb particular types of problems. Here, on the first page of the Dojo Guide you can see that Black Flag is a very popular problem.  I can see that I should set another problem in this same range that highlights a different set of skills and challenges. 


Build community

We welcome beginners and pros, young and old.  The common denominator is that the dojo is a place of learning.  We encourage a positive approach to learning for everyone.  This type of informal, peer to peer learning used to be the mainstay of climbing instruction, and the dojo keeps that tradition going.  

Ultimately, climbing is meaningless and of little value.  But caring for others and helping them develop is one of the most important things we can do.  So, by building community with a home climbing wall we can collectively transform something that is rather trivial into a community process that can make a difference in our lives and in the lives of others.  I think this is what makes some climbing scenes so much more valuable than others.